Agenda
- Introduction
- Domain user, Local user
- SQL Server installation
- Configure SSRS
- Dynamics AX installation
- Check results
- Summary
Introduction
Hello mates! This lesson shows how to install Dynamics AX 2012. The process is not difficult and similar for all versions of Dynamics AX. Let’s begin. The most challenging is to find Dynamics AX installation files. If you have access to the Partners source or Customer source, you can find installation files of Dynamics AX 2012 here (DAX2009 here). You can also find the Virtual Machine with the installed DAX and all required applications here. This lesson covers all the steps to manually install DAX rather than how to access and work with an already installed virtual machine.
Domain user, Local user
Officially Dynamics AX can be installed only for a domain user. I recommend installing Dynamics AX for a domain user also. To check that your user is a domain user, navigate to the Computer icon of the Windows explorer, right-click, and select Properties (or follow this path: Control Panel\System and Security\System). The System window opens. Here you can find the Domain field under the Computer name, domain, and workgroup settings group. If you don’t have this field, your user is not a domain user. If you want to install Dynamics AX to your laptop that doesn’t have a domain user, you can do that by installing Windows Server, setting up a domain controller, and creating your own domain user. Then install Dynamics AX under that domain user. If you want to install Dynamics AX 2009 to your laptop under the local user, you will have additional troubles. I have tried to do this but it was unsuccessful.
SQL Server installation
To install Dynamics AX, the SQL server is required. I have installed SQL Server Express edition and have problems with reports. In Dynamics AX 2012 reports are running on the SQL Server Reporting Services (SSRS). SQL Express edition has advance package that include the SSRS. But this SSRS can not use the AXREPORTDATAPROVIDER report data source. So advanced package of the SQL Express edition can not be used for Dynamics AX 2012 (and AX 2009 also, because there are also SSRS reports). For the Dynamics AX 2012 (2009) it is required to install the SQL Server Standard edition to be able to run Dynamics AX SSRS reports. I have installed the SQL Server Standard edition with SP1:
- The SQL Server installation center window opens. Click the New SQL server stand-alone installation or add features to an existing installation menu button. (For SQL 2008, the menu button is called “New installation and add new features to an existing installation”)
- The SQL Server 2012 Setup wizard opens. If it is your first SQL server installation, then it is required to enter the Product key. Then the support files will be installed. After that the computer restart is required. You will be notified about this on the Setup Support Rules page.
- Restart the computer if required. Run installation again and repeat the step 1.
- The License Terms page opens. Select the I accept license terms check box and click Next.
- The Setup Role page opens. Select the SQL Server Feature Installation option and click Next.
- The Feature Selection page opens. Select all check boxes and click Next (I have excluded the Reporting services SharePoint and Distributed Replay options).
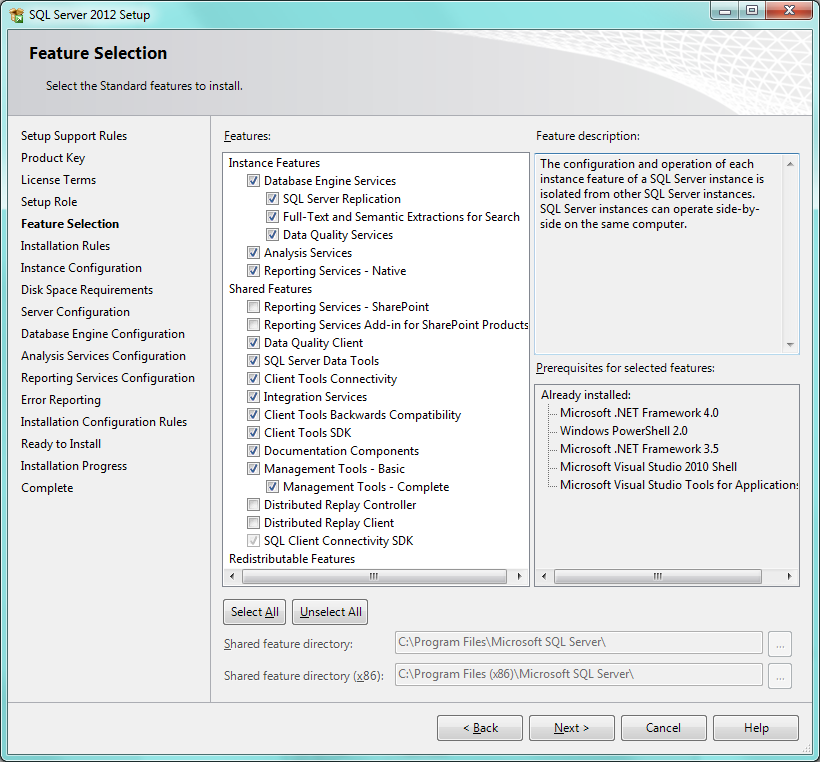
- On the Installation Rules page, some validation will be done automatically.
- The Instance Configuration page opens. Select either the Default instance or the Named instance radio button and set the desired name for the SQL server. Click Next.
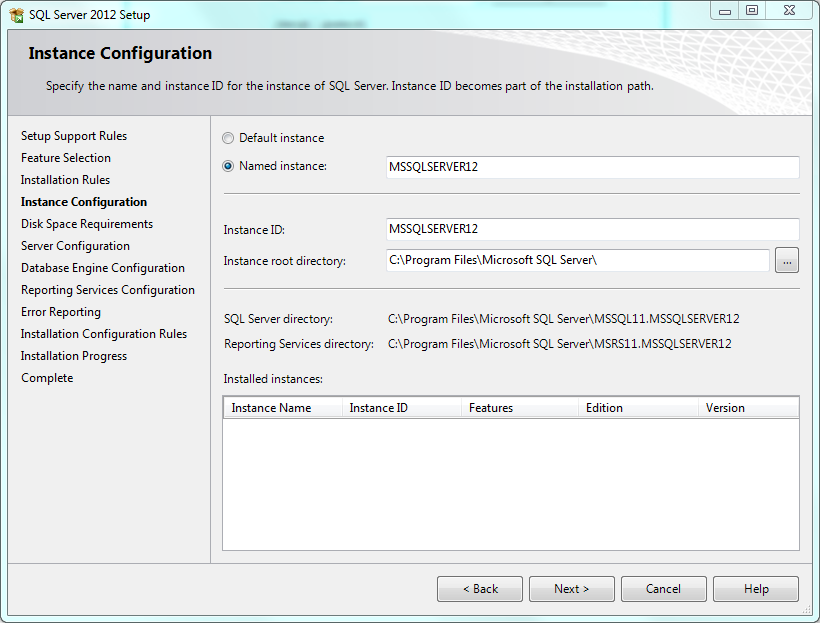
- On the Disk Space Requirement page, the system will validate the disk space.
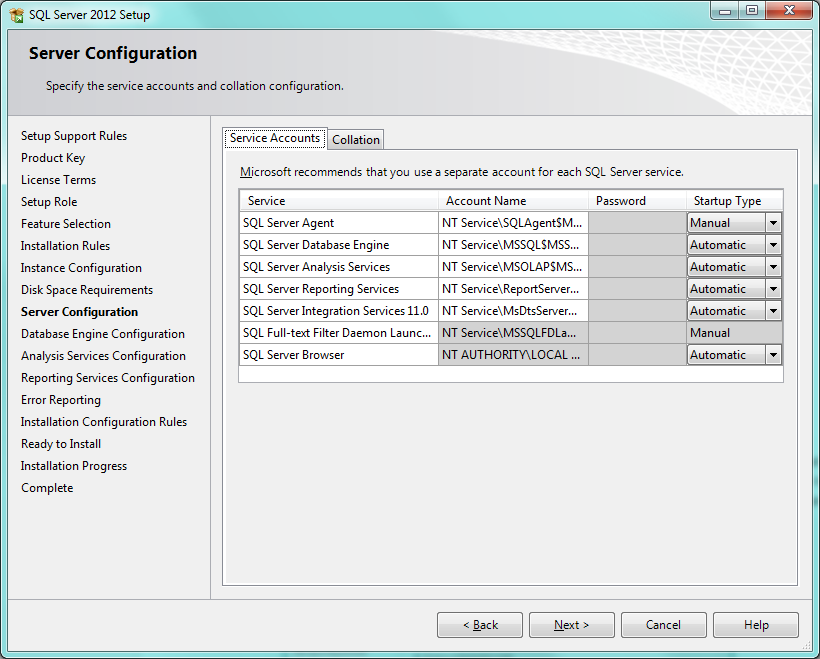
- The Server Configuration page opens. Here, we can set up a user for the SQL server windows service. Leave the default value and click Next.
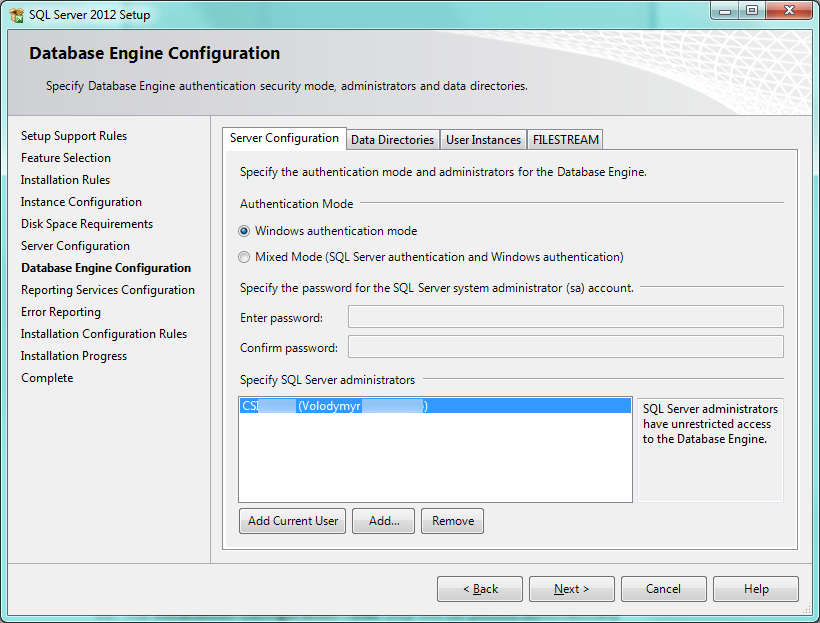
- The Database Engine Configuration page opens. The Mixed Mode is required when you set up under a local user. If you set up under a domain user, the Windows authentication mode is enough. Add your domain user as a sever administrator (if it is not added automatically) and click Next.
- The Analysis Services configuration page opens. Add the current domain user and click Next.
- The Reporting Services configuration page opens. Select the Install and configure radio button and click Next.
- The Error Reporting page opens, click Next.
- The Installation Configuration Rules step will be passed automatically.
- The Installation process is started. The process will take up to 1 hour. When it is finished, the Complete window appears. Click Close.
Congratulations! The SQL server, SSAS and SSRS are successful installed. To review the results, go to the Windows services and find the SQL Server and SQL Server Reporting Services services and makes sure that they are in the Started mode.
Configure SSRS
To complete the SSRS server configuration, do the following:
- Enable and configure IIS on your machine. I have also logged off and logged on after enabling the IIS.
- Run as administrator the Reporting Services Configuration Manager.
- Connect to the installed SSRS instance.
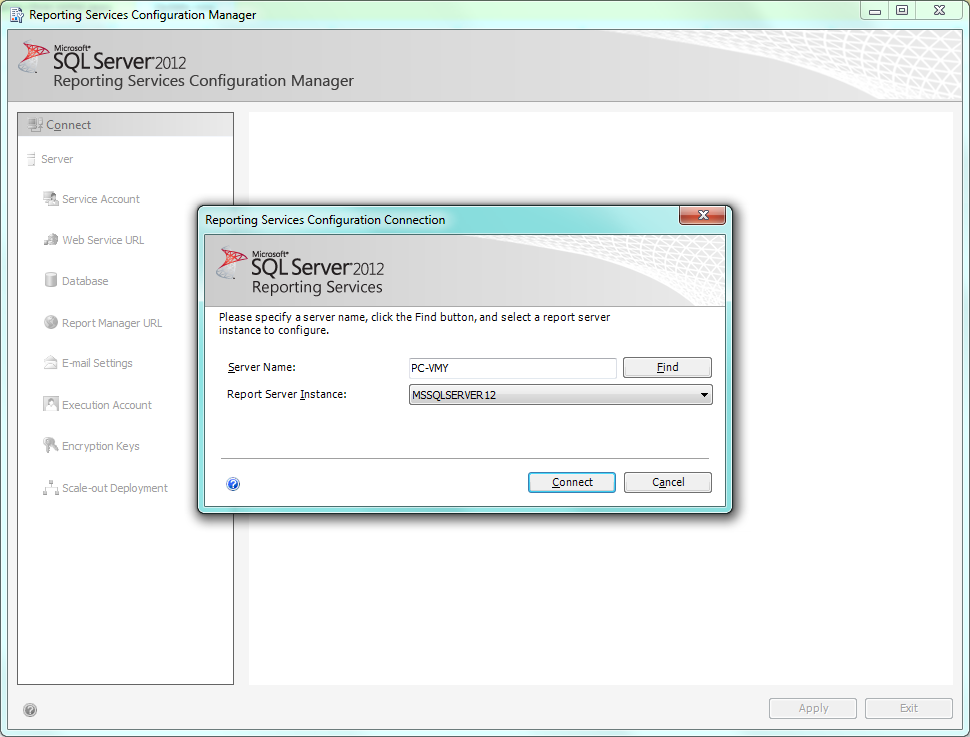
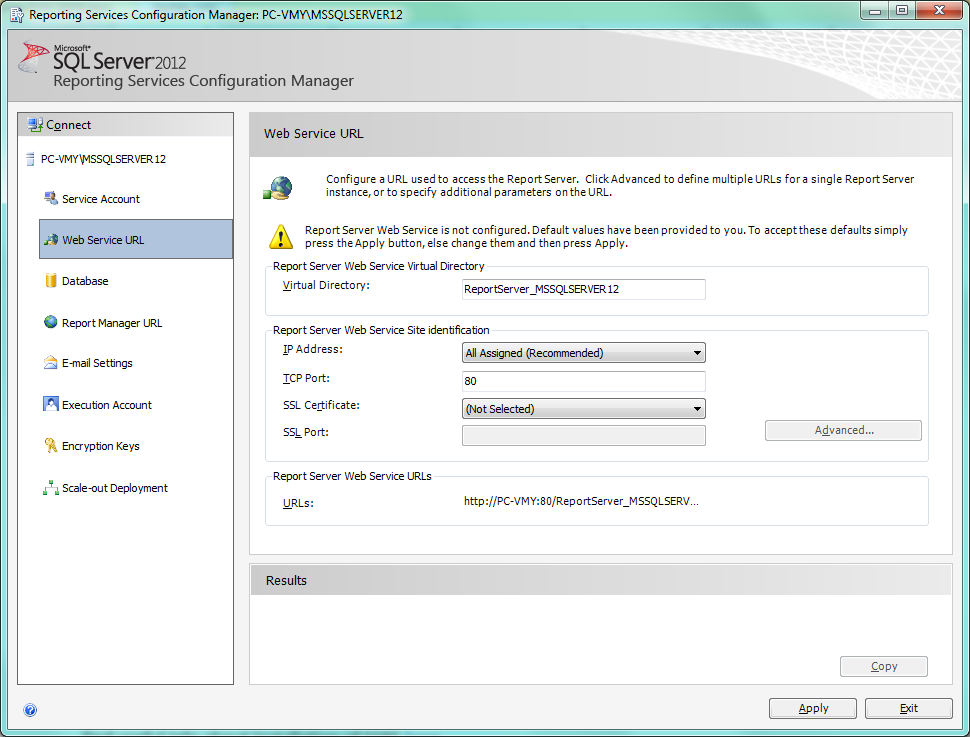
- Go to the Web Service URL tab, review the parameters, and click Apply.
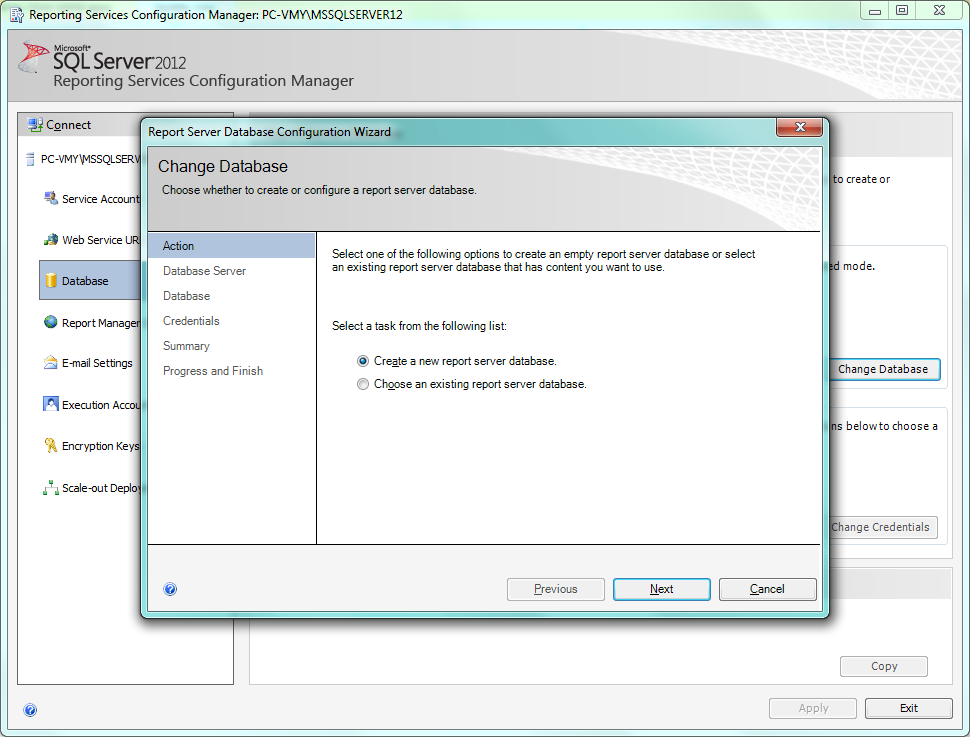
- Go to the Database tab, click the Change Database The Wizard opens
- Select the Create a new report server database option and click Next.
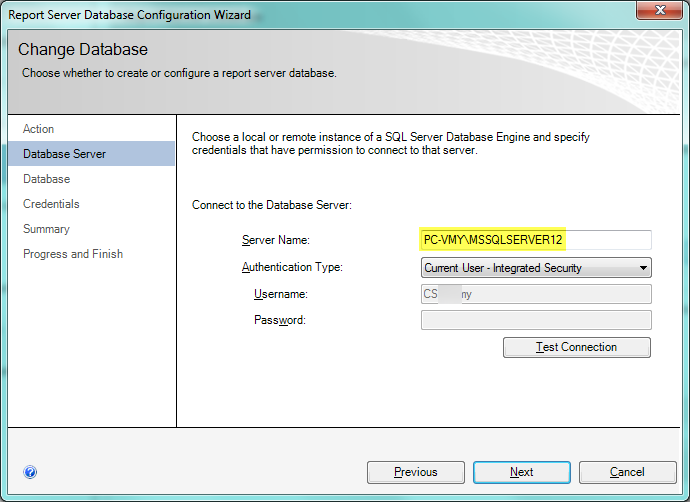
- On the Database Server tab, specify the Server name, SQL instance name. Click the Test connection to make sure that there are no issues. Click Next.
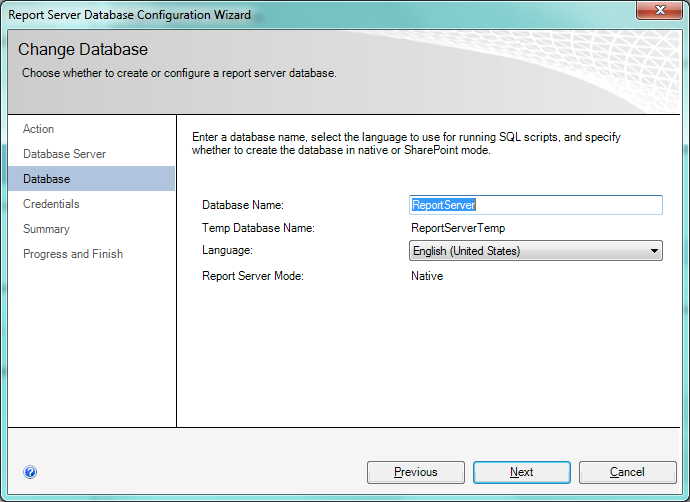
- On the Database tab, specify the database name. Click Next.
- On the Credentials tab, I leave the default setup. I.e. the Authentication mode is set to Service Credentials. Click Next.
- On the Summary tab, click Next. On the Progress and Finish tabs, click Finish.
- Select the Create a new report server database option and click Next.
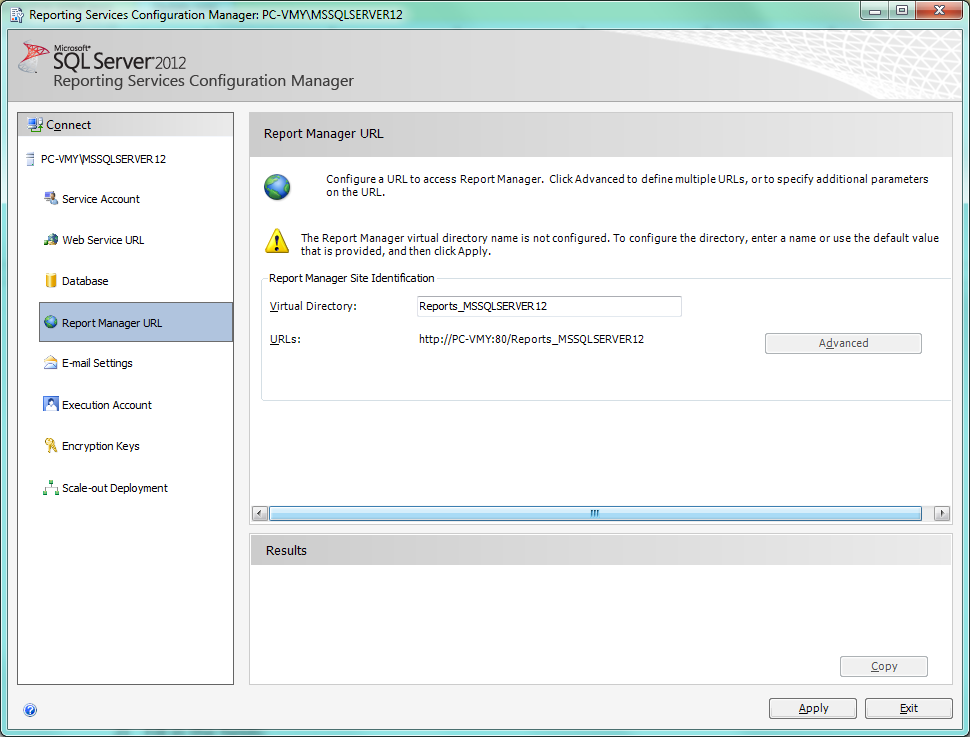
- Go to the Report Manager URL tab. Click Apply.
Let’s check the results. Restart the SSRS. Run Internet Explorer as administrator and specify the Report Manager URL (in my case it is https://pc-vmy/Reports_MSSQLSERVER12/Pages/Folder.aspx). The SSRS home page opens.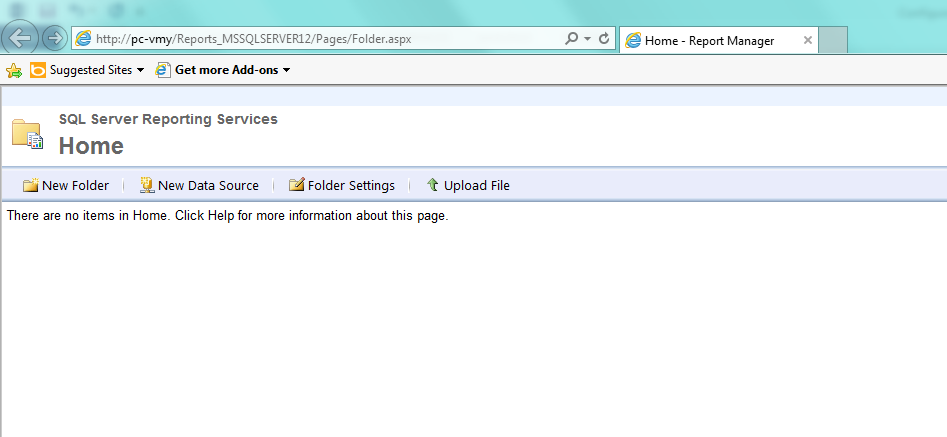
Congratulations! The SSRS are successfully configured.
Note that the Service and Execution accounts will be updated (or created) later with Microsoft Dynamics AX .Net Business Connector account. It is done automatically when the Dynamics AX Reporting Services extensions component is installed.
Dynamics AX installation
Now we can set up Dynamics AX. Find the Setup.exe file in your Dynamics AX installation folder and run it:
- The Microsoft Dynamics wizard opens. Click the Microsoft Dynamics AX components menu button.
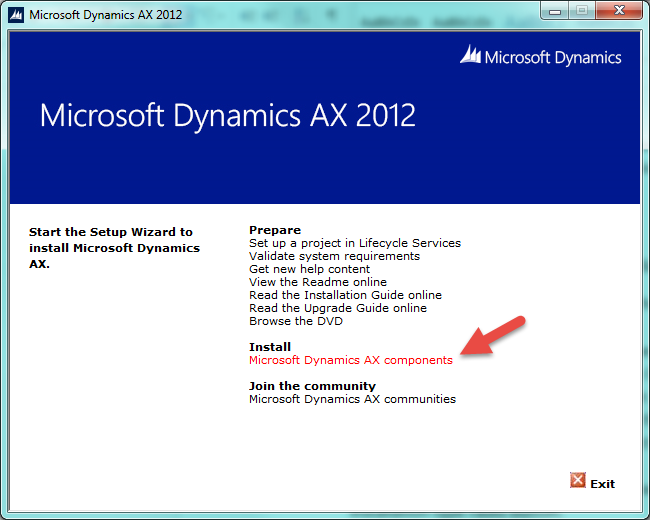
- The Microsoft Dynamics AX Setup wizard with the Welcome page opens. Click Next to continue.
- The License terms page opens, select the I accept the license terms check box and click Next. (This page opens only if you run installation for the first time.)
- The Customer Experience Improvement Program page opens. Select what fits you and click Next. (This page opens only if you run installation for the first time.)
- The Select a file location page opens. I leave the default File location value (“C:\Program Files\Microsoft Dynamics AX\60”). Click Next. (This page opens only if you run installation for the first time.)
- The Ready to install page opens. Clicks the Install Setup will install the support files. (This page opens only if you run installation for the first time.)
- The Select an installation option page opens. Select the Microsoft Dynamics AX radio button and click Next.
- The Select installation type page opens. To see what will be installed, select the Custom installation type radio button.
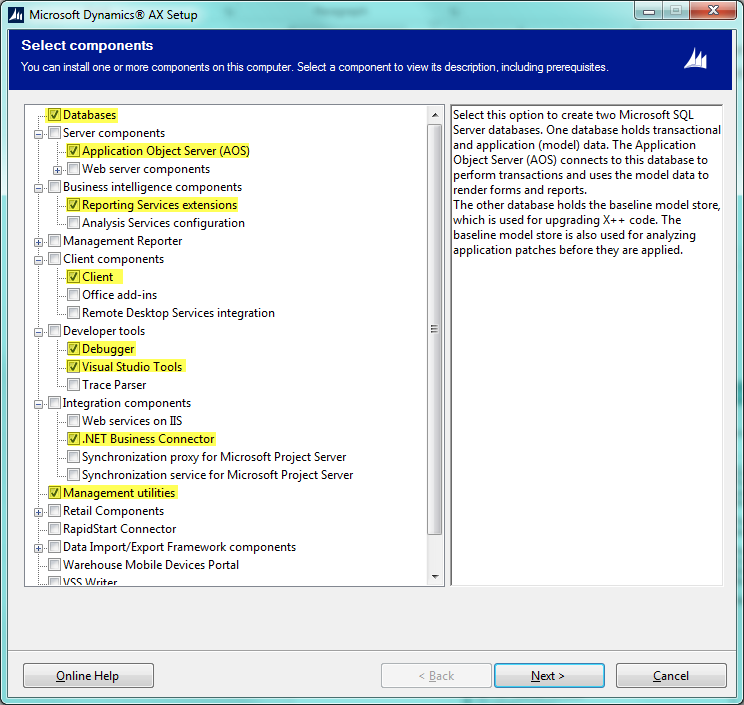
- The Select components window appears. Select the following components and click Next
- Database
- Application Object Server (AOS)
- Reporting Services extension (it is used for reports). Info window will appears click Ok.
- Client
- Debugger (for developers)
- Visual studio tools (for developer for SSRS report development)
- .Net Business Connector
- Management utilities
- The Prerequisite Validation page opens. I have 7 Errors.
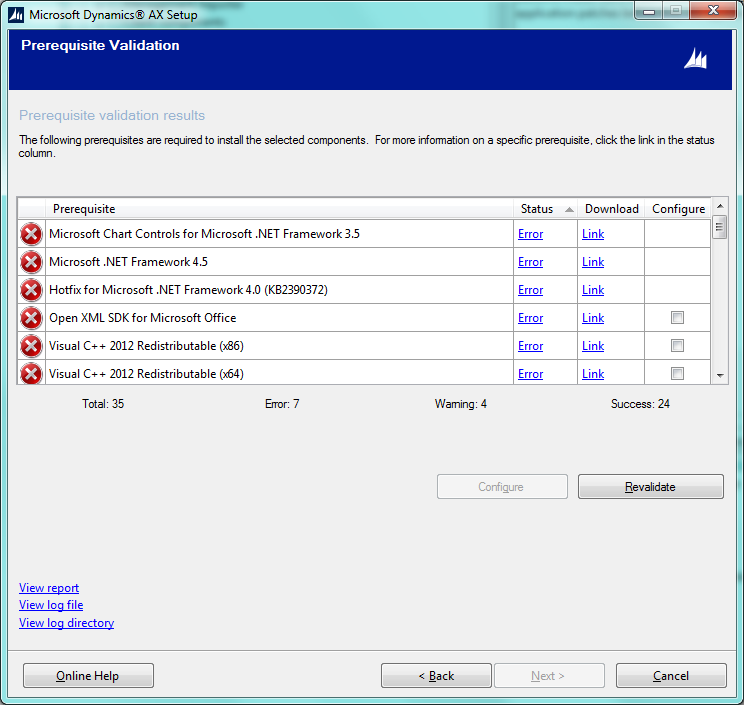
- I have resolved all errors by clicking the Link button and installing all required components. Click Next.
- The Select a file location page opens. I leave the default File location value (“C:\Program Files\Microsoft Dynamics AX\60”). Click Next.
- The Select databases page opens. Select the Create new databases radio button and click Next.
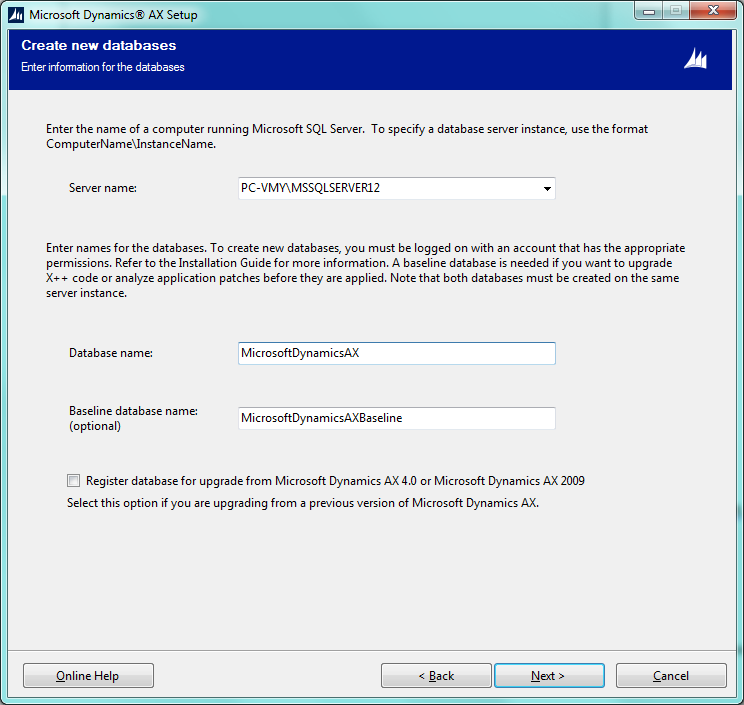
- The Create new databases page opens. The Server name contains the SQL server name (was installed in the previous topic). All fields will be populated automatically, so I leave it as is. Click Next.
- The Select additional models page opens. The Foundation model is mandatory and selected. This model contains all metadata and the en-us label file (English United states). If you need additional language, select the Foundation Labels model. In this case all available languages are set up. Click Next.
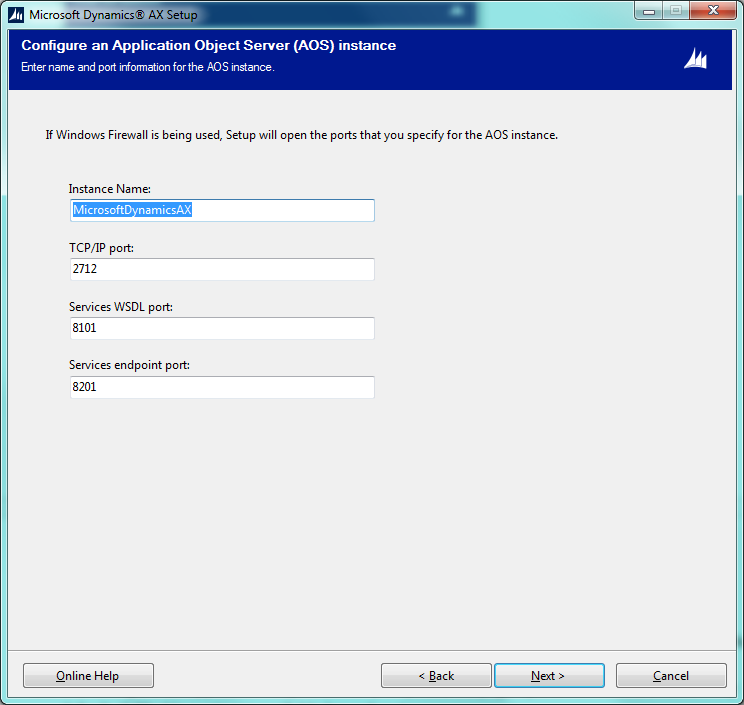
- The Configure an Application Object Server (AOS) instance page opens. All fields are filled in by default. If the fields’ values are acceptable to you leave them as they are. The TCP/Ip port can be changed later in the Dynamics AX Server configuration. Click Next.
- The Specify an AOS account page opens. You can specify your domain account or use the NT Authority local account for AOS. AOS will be installed as a Windows Service. As it often happens in production environment, the new domain user is created and assigned to the AOS. The AOS account can be changed later in the Windows Services. I will specify my domain account as it has all necessary rights and click Next.
- The Select client preference page opens. Here the Dynamics AX Client language is specified. I have set up the English language, the Developer installation type. Now select the Create a desktop shortcut checkbox, and click Next.
- The Specify Business Connector proxy account information page opens. Specify the domain user that will be used by the .Net Business connector to log in to Dynamics AX. Business connector is used by the SSRS reports. I will set up my domain account and click Next.
- The Specify a Reporting Services Instance page opens. The Instance name field will be filled in by default. I clear the Deploy report checkbox. I want to check the Dynamics AX report configuration before deploying reports. All in all I will deploy reports to SSRS later in the Load demo data lesson. Click Next.
- The Prerequisite validation page opens. I have one error – Microsoft Analysis Management Objects. This error is solved by clicking the Link Click Next.
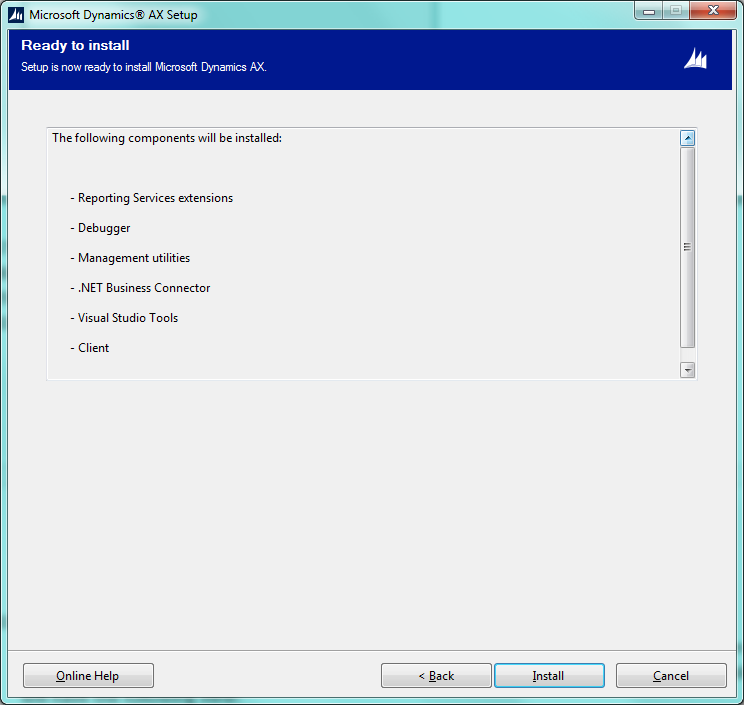
- The Ready to install page opens. Click Install. This process will take about 1 hour.
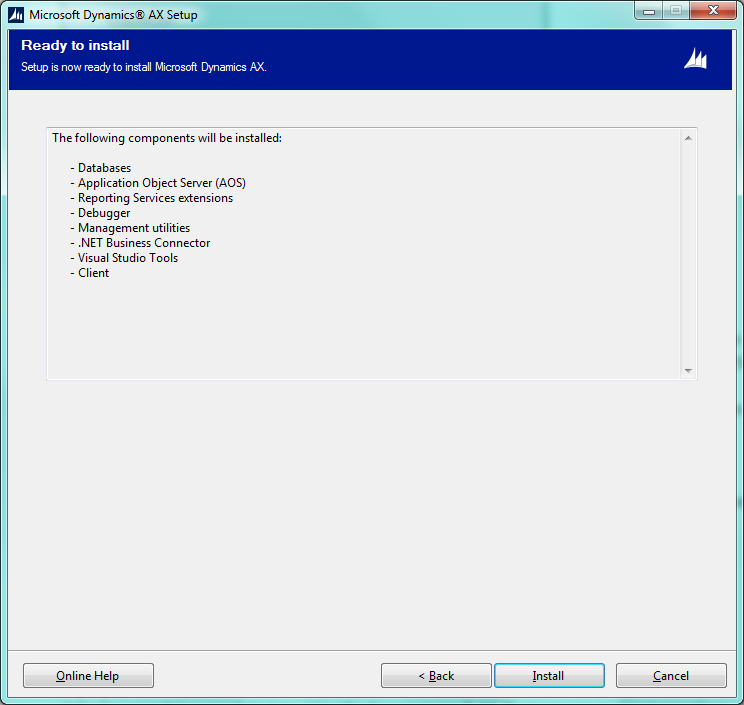
- When the process is complete, the Setup was not completed page opens.
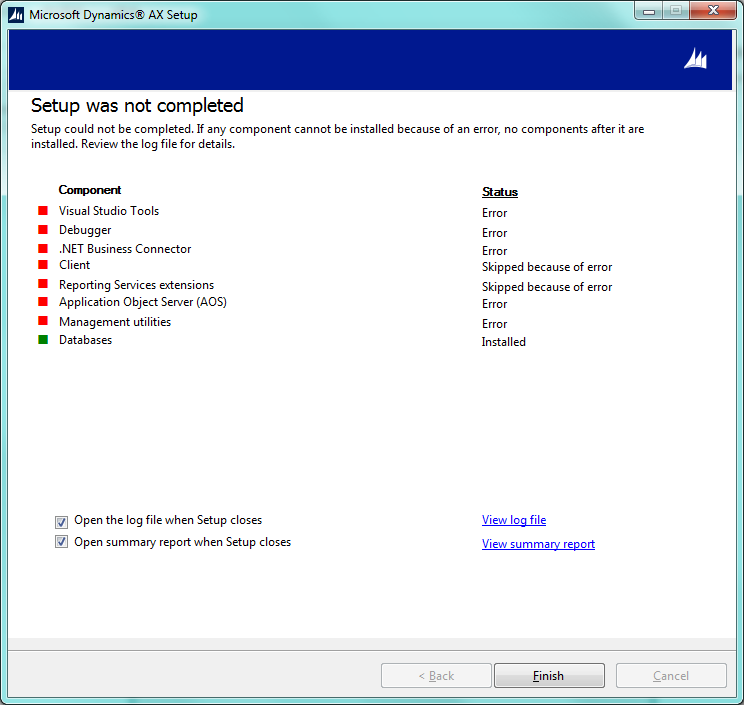 We can see that Databases were installed successfully and the rest of components were not installed. But, it is not true, if we go to Windows Services, we can find the Microsoft Dynamics AX Object Server service in the Starting status. It means that AOS was installed.If we open the summary report, we can find that the wizard assumes that AOS was not installed because “The following error/warning occurred: Time out has expired and the operation has not been completed.”So AOS was installed but not yet started. The rest of components that depend on AOS were not installed also.
 - Finish the Microsoft Dynamics Wizard and wait one more hour till AOS is started.
- Run the Microsoft Dynamics Wizard
- The Welcome page opens. Click Next.
- The Modify Microsoft Dynamics AX installation page opens. Select Add or modify components and click Next.
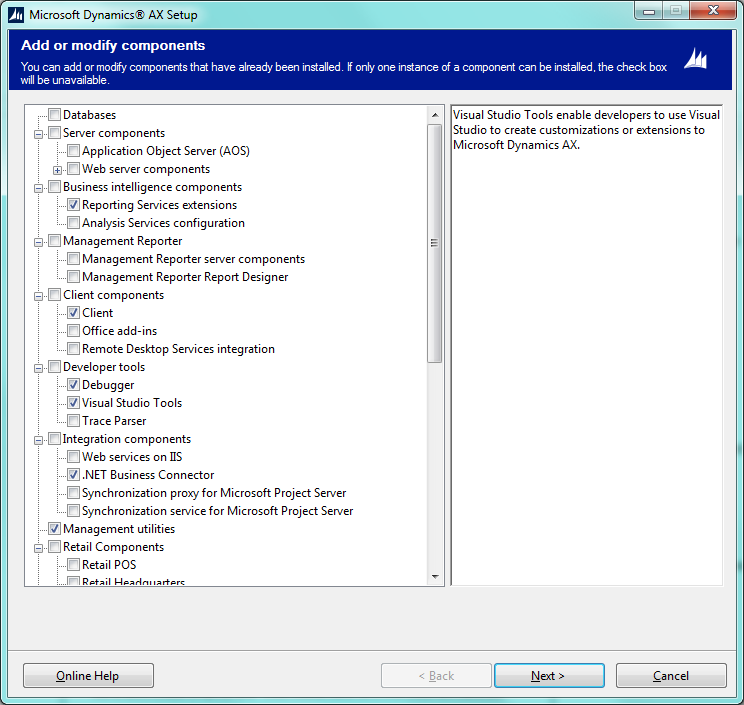
- The Add or modify components page opens. Select the following components: Reporting Services extension, Client, Debugger, Visual studio tools, .Net Business Connector, Management utilities and click Next.
- The Prerequisite Validation page opens. Since we have already installed all required components, there are no errors. Click Next.
- The Select client preference page opens. Here, the Dynamics AX Client language is specified. I have set up the English language, Developer installation type. Select the Create a desktop shortcut check box and click Next.
- The Specify a location for configuration settings page opens. Select the Save configuration in the registry radio button. If a configuration file will be required, later we can generate it from the Microsoft Dynamics AX Configuration application (it will be available in the Windows Administrative Tools). Click Next
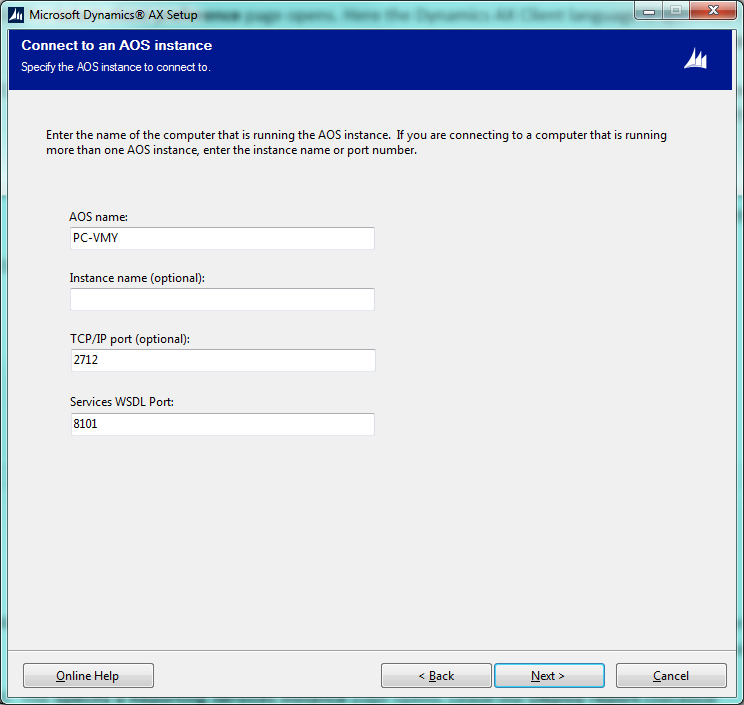
- The Connect to an AOS instance page opens. Specify the connection parameters that will be used by the Client. I leave the default ones as they fit me. The parameters should match the AOS parameters that were specified in step 16. Note that on this step, the AOS should run (to review the service status go to Windows Services > Microsoft Dynamics AX Object Server).
- The Specify Business Connector proxy account information page opens. Specify the domain user that will be used by the .Net Business connector to log in to Dynamics AX. The Business connector is used by the SSRS reports. I will set up my domain account and click Next.
- The Specify a Reporting Services Instance page opens. The Instance name field will be filled in by default. Again I clear the Deploy report checkbox. I want to check the Dynamics AX report configuration before deploying reports. All in all I will deploy reports to SSRS later in the Load demo data lesson. Click Next.
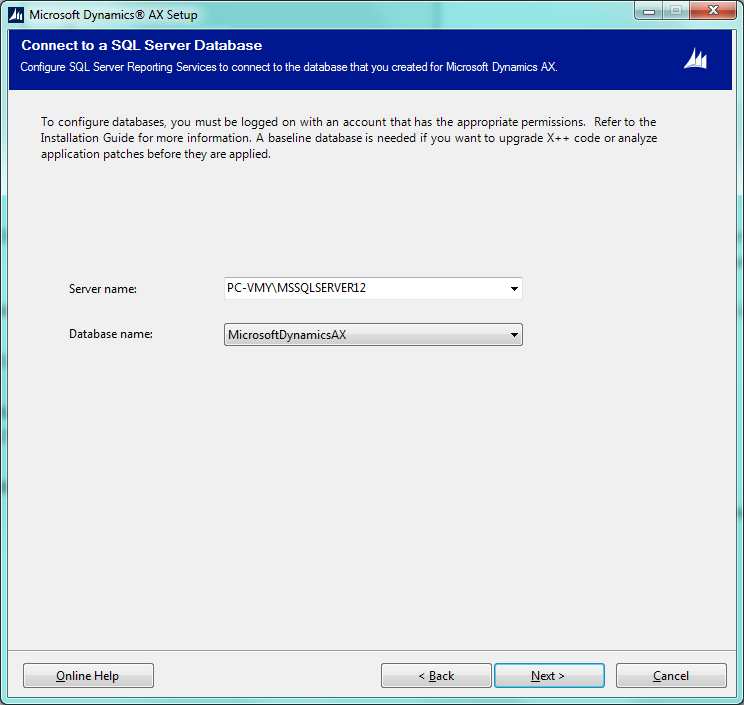
- The Connect to a SQL Server Database page opens. Here we should specify the SQL server and the database name where the Dynamics AX database was installed. In my case, it is:
- The Prerequisite validation page opens. We already were at this step so now we don’t have any validation errors. Click Next.
- The Ready to install page opens. Click Install. This process will take about 0.5 hour.
- When the setup is complete, the Setup was completed successfully page opens. Click Finish.
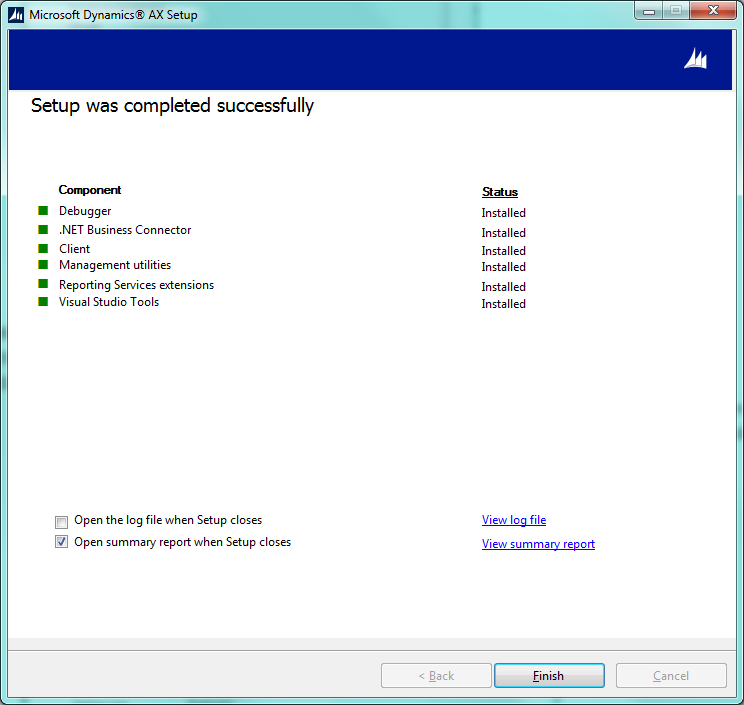
Congratulations! The Dynamics AX 2012 was installed successfully.
Check results
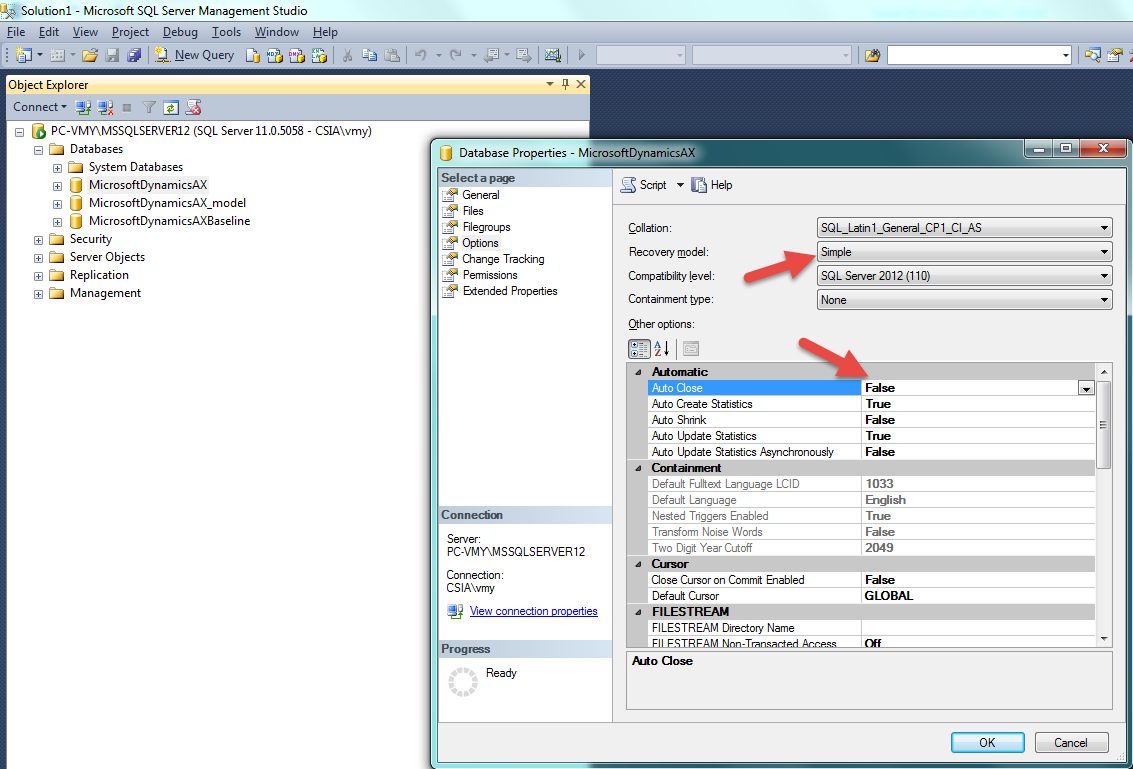
Let’s check that the databases are installed. Start the SQL Server management studio from the Windows > All programs > Microsoft SQL Server 2012 > SQL Server Management Studio. Connect to the installed server instance (in my case, it is PC-VMY\MSSQLSERVER12) with the windows authentication mode. There are three databases: MicrosoftDynamicsAX, MicrosoftDynamicsAX_model, MicrosoftDynamicsAXBaseline. The MicrosoftDynamicsAX database is used for storing data. There are for example CustTable, CustTrans, and SalesTable tables that will contain Customers, Customer transactions, and Sales orders correspondingly. Note that these tables will appear in the MicrosoftDynamicsAX database only after the synchronization process (will be executed in the next Configuration lesson). The synchronization process will generate tables from the metadata that is stored in the MicrosoftDynamicsAX_model database. The MicrosoftDynamicsAX_model database is used for storing metadata (model store). The metadata contains the information about all Dynamics AX elements: class names, method names, code, compiled code, CIL code, table structures (table name, field name, and indexes), forms etc. The synchronization process will generate tables (for example, CustTable, CustTrans, SalesTable) in the MicrosoftDynamicsAX database from the metadata that is stored in the model table (the ModelElementData table) in the MicrosoftDynamicsAX_model database. Note that in Microsoft Dynamics AX 2012 R3 and Microsoft Dynamics AX 2012 R2, the metadata (model store) and the data (transaction data) are stored in separate databases. But in earlier versions of Microsoft Dynamics AX, the metadata and data are stored in a single database (for example in our case it would be the MicrosoftDynamicsAX database). It is because Microsoft has decided to place tables that store data in a separate database. In this case it is easier to move data from one environment to another without moving the code. Note that in any case it is a difficult process since the table structure (table name, field name, and indexes) is stored in the metadata and can differ between environments. In this case after you move your data and run synchronization process, some data can be deleted because the data structure is different (for example, if a table column is renamed or deleted). In this case the data scripts are required but this is another story =) The MicrosoftDynamicsAXBaseline database is used for the upgrade purposes. This is an optional database. This database contains one more metadata (model store). It contains the same tables as the MicrosoftDynamicsAX_model database. The metadata from this database can be compared with the metadata from MicrosoftDynamicsAX_model inside one instance of Dynamics AX. By default all databases that are installed on SQL express server are configured with some values. We should check several parameters that are mandatory or desirable for the Dynamics AX databases. In the SQL Server Management Studio, right-click the MicrosoftDynamicsAX database and select Properties. The Database Properties form opens. Go to the Options page. Make sure that the:
- Auto Close property is set to False. It is a mandatory setup. In other case Dynamics AX will work very slowly.
- Recover model is Simple. For a development, test, and educational environments, it is a desirable option because it saves space on your disc.
Do this for all three databases. Now we are ready to launch the Dynamics AX client. Let’s try to do this. Go to Windows > All programs > Microsoft Dynamics AX 2012. The Dynamics AX Client opens. For the first time, this process will consume up to 30 min.
Summary
All components cannot be installed in one run because the AOS start takes longer time than the Setup assumes. So if you don’t want to see the Setup was not completed page, set up the Dynamics AX components in the following two steps:
- Run the Setup and install the Databases and Application object server Wait till AOS is started.
- Run the Setup and install the rest of components.
Note that the Auto Close (AUTO_CLOSE) property must be set to False for all Dynamics AX databases (MicrosoftDynamicsAX, MicrosoftDynamicsAX_model, MicrosoftDynamicsAXBaseline) – in other case Dynamics AX will work very slow.
Advertorial
Load/access your essential Microsoft Dynamics 365 application on your hosted virtual desktop from www.CloudDesktopOnline.com and access it remotely from anywhere on any device(PC/Mac/android/iOS). If you prefer a server, Rent a server at affordable prices and 100% money back guarantee from Apps4Rent.
Hey there,
I keep a lack of memory error when I try to install AX on virtual machine (Win 8.1 Pro). I have 12GB memory assigned to the virtual machine (Dynamic allocation, but I have also tried Fixed memory allocation, but keep getting the same error).
Here’s an image of the error.
http://s19.postimg.org/6e54xyloj/DAX_Memory_Error_at_Startup_001.png
Thanks for your response.
Update:
I have logged onto AX.
Here’s what I did:
1. I stopped: All Sharepoint Services, All Retail Related Services, MSMQ, and all other messaging services.
2. Increased the VM memory back to 12GB.
3. Stopped a few processes on the host.
That made it work, but now Enterprise Portal is not available. But at least the core application is working (yeah!)
For Trial Version of Dynamics AX use followed link :
http://getintopc.com/softwares/erp-systems/microsoft-dynamics-ax-2012-free-download/